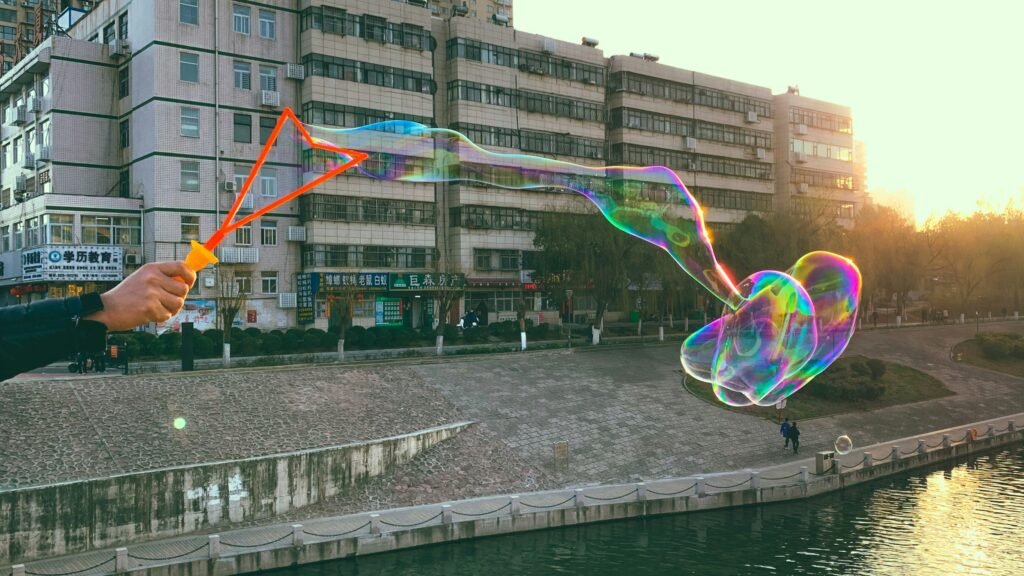
How to make super bubble science project
Introduction to Super Bubbles
Bubbles have captivated individuals of all ages with their captivating ability to float and shimmer in the air. Among the various types of bubbles, super bubbles stand out not only for their impressive size but also for their remarkable stability and longevity. These bubbles are a perfect subject for science projects, blending elements of art and science while providing an engaging and visually impressive demonstration of physical principles.
In educational contexts, super bubbles illustrate fundamental concepts in chemistry and physics. For instance, the creation of a super bubble involves understanding the properties of soap solutions, surface tension, and gases. The appeal of bubbles as a topic lies in their simplicity as well as the complex scientific principles behind their formation. Students often find bubbles to be an exciting visual phenomenon that makes learning about scientific concepts more engaging.
The chemistry behind bubbles involves surfactants, which are substances that reduce surface tension in liquids. In a soap solution, the surfactants create a thin film that can trap air, resulting in the formation of a bubble. Super bubbles are created by optimizing the ingredients in the soap solution, often using commercial bubble solutions or specific recipes to enhance their durability and size. The incorporation of various additives can lead to different characteristics of the bubbles, such as their colors and resistance to popping. This interaction between chemistry and hands-on experimentation enables learners to grasp complex ideas through playful exploration.
Overall, super bubbles represent an excellent opportunity for students and educators alike to explore scientific concepts in a fun and interactive manner, making them an ideal choice for projects that aim to reveal the wonders of science through everyday phenomena.
Materials Required for the Project
Creating the ultimate super bubble science project requires specific materials to ensure success. Below is a list of the materials necessary for the bubble solution and wand, along with detailed quantities and specifications to aid readers in replicating this engaging project.
1. Distilled Water: 2 cups (approximately 480 mL) of distilled water is recommended. Distilled water is preferred as it is free from impurities that can affect bubble formation.
2. Dish Soap: ½ cup (about 120 mL) of a high-quality dish soap is essential for making the bubble solution. Brands that are known for their excellent bubble-making qualities should be considered.
3. Glycerin: 1 tablespoon (15 mL) of glycerin is ideal for enhancing the durability of the bubbles. This can generally be found in pharmacies or baking sections of grocery stores.
4. Corn Syrup: 1 tablespoon (15 mL) of corn syrup is another ingredient that contributes to the strength of the bubbles. It acts similarly to glycerin, helping to maintain the integrity of the bubbles.
5. A Mixing Container: A large bowl or bucket for mixing the bubble solution is necessary. A container that can hold at least 1 quart (about 1 liter) is preferable.
6. Wand Materials: For the bubble wands, you can use two sturdy straws, or a wire hanger bent into a circular shape, depending on your preference. If using a hanger, ensure to wrap the ends with tape for comfort holding and safety.
7. A Tray: A shallow tray or dish to carry the bubble solution during the project, which allows for ease of dipping the wand into it. A tray with raised edges will help contain any spills.
8. Food Coloring (Optional): A few drops of food coloring can add a fun visual element when creating the bubbles but is not necessary for the functionality of the project.
Having these materials on hand will make it simple to follow the steps of the ultimate super bubble science project, ensuring a successful and enjoyable experience.
Step-by-Step Instructions for the Bubble Solution
Creating an effective bubble solution is essential for achieving optimal bubble quality in your science project. Here, we will provide a detailed guide on how to prepare this solution, including precise mixing instructions, the importance of allowing the solution to sit, and various tips to enhance your bubble-making experience.
To begin, you will need the following ingredients: distilled water, dish soap, and glycerin. The use of distilled water is crucial, as it is free of impurities that could interfere with bubble formation. For a basic recipe, mix 1 cup of distilled water with 1/4 cup of dish soap and add 1 tablespoon of glycerin. Glycerin is an essential ingredient because it helps to strengthen the bubbles, making them last longer and resist popping.
Once you have gathered your materials, proceed to mix the ingredients. In a bowl, gently stir the distilled water and dish soap together, ensuring that you do not create too many bubbles during the mixing process. After thoroughly combining these two components, add the glycerin, which will act as a bubble enhancer. Continue to stir gently until all ingredients are well integrated. It is important to note that vigorous stirring can introduce excess air, which may lead to premature bubble collapse.
After mixing, allow the bubble solution to sit for a minimum of three hours, or preferably overnight. This resting period is vital because it enables the ingredients to blend seamlessly, enhancing the overall quality of the solution. During this time, the soap molecules align and form a more cohesive mixture, resulting in stronger bubbles and improved stability.
For optimal results, consider a few additional tips. Use a high-quality dish soap, as this can significantly affect the durability and size of the bubbles. Experiment with varying ratios of soap and glycerin to find the perfect combination for your needs, as different brands may yield different results. Lastly, always store your bubble solution in a tightly sealed container to prevent contamination and evaporation of the glycerin, ensuring excellent bubble quality whenever you are ready to use it.
Constructing Your Homemade Bubble Wand
Creating an effective bubble wand is a key step in any bubble-related science project. This task can be accomplished using simple household items, making it easily accessible for aspiring scientists of all ages. Below are the steps to create a homemade bubble wand, along with an explanation of the significance of each component.
To begin with, you will need two primary components: a handle and a loop. The handle can be crafted from a variety of materials such as a sturdy straw, a wooden dowel, or even a wire coat hanger. The length of the handle can be adjusted according to personal preference, but a length of around 12 inches is ideal for grasping. A longer wand may facilitate the creation of larger bubbles, while a shorter one is easier to manipulate.
Next, for the loop, you can use a plastic bottle cap, a metal ring, or shape a piece of wire into a circular form. The size of the loop is crucial, as it determines the size of the bubbles produced. A loop with a diameter of approximately 3 to 5 inches strikes a balance between ease of use and bubble size. This component’s design will also affect bubble formation; a smooth, circular edge allows for consistent bubble creation.
To assemble your wand, securely attach the loop to the handle. If using wire, ensure the loop is tightly wrapped and stable. For a straw or dowel, you can use adhesive or tape to keep the loop in place. Proper attachment is essential, as any instability can cause the bubbles to burst prematurely.
The effectiveness of your homemade bubble wand largely hinges on the materials used and the shape of the loop. By experimenting with various designs and dimensions, you will observe how these factors influence the bubbles produced. Overall, constructing your bubble wand serves not only as a creative exercise but also reinforces core principles of surface tension and air pressure in the science of bubble formation.
Techniques for Blowing Giant Bubbles
Blowing giant bubbles can be an exhilarating experience, and mastering the art requires a combination of the right materials and techniques. One critical aspect is the bubble solution itself. To create larger bubbles, a mixture of dish soap, glycerin, and water is recommended. The glycerin acts as a stabilizer, allowing the bubbles to last longer and be more resilient during their formation and transportation through the air.
When it comes to using the wand, it is important to select one that is appropriately sized for bubble blowing. A wand with a larger hoop is essential for creating giant bubbles. Dipping the wand into the solution should be done slowly to ensure that the solution properly coats the hoop without dripping excessively. Once the wand is ready, the technique involves a gentle pull and twist, allowing the bubble to begin forming.
Movement plays a vital role in successfully creating giant bubbles. Instead of blowing at the bubble directly, one should aim to create a consistent airflow by moving the wand gently through the air. A slow, steady movement helps to maintain the integrity of the bubble, minimizing the risk of it bursting prematurely. Additionally, it is advisable to avoid areas with strong winds, as sudden gusts can disrupt the bubble’s formation. Optimal conditions are usually found in locations with light breezes or when there is no wind at all.
Furthermore, timing is crucial; the best results often occur when the humidity is higher. A little moisture in the air can help create more stable bubbles. Other tips include ensuring that the wand and bubble solution are free of dirt or debris, which can weaken the bubbles, and practicing regularly to refine one’s technique for a better performance. With these techniques in mind, one can look forward to an enjoyable and rewarding experience in creating giant bubbles.
Understanding the Science Behind Bubbles
Bubbles are fascinating phenomena that capture the attention of both children and adults. The formation of bubbles involves several scientific principles, primarily surface tension, evaporation, and the composition of the bubble solution. Understanding these concepts is essential for creating a successful bubble science project.
Surface tension is the elastic-like force present on the surface of a liquid, which allows it to resist external forces. It is primarily caused by the cohesive forces between liquid molecules. In the case of a bubble, surface tension plays a crucial role in maintaining its shape and integrity. When a bubble is formed, air is trapped within a thin layer of liquid, and the molecules at the surface are drawn closer together, creating a tension that holds the bubble together.
Evaporation also significantly impacts the lifespan of a bubble. As the thin film of liquid that surrounds the air begins to lose water molecules to the surrounding environment, the bubble gradually shrinks until it ultimately pops. Therefore, the rate of evaporation is an important factor that determines how long a bubble will last. This is where the ingredients of the bubble solution, such as water, liquid soap, and sweeteners like corn syrup, come into play.
By adding corn syrup to the bubble mixture, the viscosity of the solution increases. This modification helps to slow down the rate of evaporation, allowing bubbles to persist longer than they would with a standard solution. Additionally, bubbles formed from solutions containing corn syrup tend to be larger, as the thicker solution allows for a more stable structure when air is entrapped. The balance of these ingredients can dramatically affect the size and longevity of bubbles, showcasing the intricate relationship between chemistry and physics in bubble formation.
Troubleshooting Common Issues
When creating a super bubble science project, enthusiasts may encounter several common problems that can hinder their bubble-making success. Addressing these issues promptly can ensure a smoother experience and allow for the development of larger and more durable bubbles.
One frequent problem is the bubbles bursting too quickly. This can be caused by factors such as low-quality soap or improper ratios of ingredients in the bubble solution. To address this issue, it is essential to use a high-quality dish soap and to experiment with different recipes. A common formulation involves mixing distilled water, dish soap, and a small amount of glycerin or corn syrup, which can help strengthen the bubble’s structure and increase its longevity.
Another issue bubble makers might face is the failure of bubbles to form altogether. This situation can arise from inadequate mixing of the bubble solution, resulting in insufficient surfactant properties. Properly combining the ingredients to create a homogenous mixture is crucial, as well as allowing the solution to sit for several hours or overnight. This resting period can enhance the effectiveness of the ingredients, resulting in stronger bubbles.
Furthermore, environmental conditions can play a significant role in bubble formation. High humidity levels tend to be more favorable for bubbles since they minimize evaporation. Conversely, windy conditions may break fragile bubbles before they reach their full potential. When weather conditions are unfavorable, consider performing the experiment indoors or in a sheltered area to provide a stable environment that is conducive to bubble creation.
In addition to these tips, maintaining a clean working area is essential. Dust and other contaminants can negatively impact bubble formation, so it is advisable to regularly clean any surfaces and tools used. By following these troubleshooting steps, many common problems can be effectively managed, allowing for an enjoyable and successful bubble-making experience.
Safe Practices and Cleanup Tips
When undertaking a bubble science project, safety should be a top priority. This is especially crucial when working with various materials and solutions that may pose risks. First and foremost, it is advisable to use non-toxic materials in your bubble solution to ensure that it is safe for both children and pets. Numerous commercial bubble solutions are available that are explicitly labeled as non-toxic, and many DIY recipes include common household ingredients that are safe for use.
In terms of handling the bubble solution itself, it is essential to supervise younger participants closely. Although the bubble mixture is typically safe, it can become slippery if spilled, potentially leading to accidents. When preparing your bubble solution, consider using a designated area on a flat surface where spills can pose less of a hazard. It is also recommended to wear gloves if you have sensitive skin, as bubble solutions can sometimes cause irritation.
To facilitate easy cleanup, prepare ahead by laying down old newspapers or a plastic tablecloth where the project will take place. This proactive measure will help contain any spills and make the cleanup process much simpler. In the event of a soap spill, clean it immediately with water to avoid slippery surfaces. It is also wise to have towels or rags on hand for drying off hands or surfaces as needed.
After you have finished with the project, make sure to properly dispose of any leftover bubble solutions, especially if they have been contaminated or include additives such as food dye. Store any unused solutions in a clearly labeled container to avoid mix-ups and to keep them out of the reach of small children. Following these safety and cleanup tips will ensure a fun and safe bubble project experience while minimizing any potential hazards.
Fun Variations and Experiments to Try
The super bubble science project is not only entertaining but also versatile, allowing for numerous creative variations and experiments. One exciting idea is to incorporate food coloring into the bubble solution. By adding various colors, children can create mesmerizing rainbow bubbles that enhance the visual appeal of their project. This simple addition transforms a standard bubble into an opportunity for an engaging art and science fusion.
Another intriguing variation is to experiment with different types of bubble wands. While traditional wand designs work well, crafting wands from everyday materials can lead to exciting discoveries. For instance, using a metal coat hanger to create a large bubble wand can produce bigger bubbles, while a straw can be used to blow smaller, more intricate bubbles. Exploring the impact of wand shape and size adds an experimental element to the project.
Furthermore, attempting to create bubbles of varying shapes can open a realm of possibilities. Instead of the usual round bubbles, consider using cookie cutter shapes or even creating your own molds from materials like cardboard or plastic. The process of blowing bubbles through these shapes allows for hands-on experimentation and encourages critical thinking about fluid dynamics and surface tension.
Encouraging kids to document their findings can also enhance the learning aspect of the project. Keeping a science journal or a photo log of each experiment not only fosters creativity but also helps solidify scientific principles through observation and comparison. By engaging with the project on a deeper level, children can draw meaningful connections between their experiments and the science behind bubbles.
In conclusion, the super bubble science project can be customized in countless ways, making it a fun educational activity. By integrating food coloring, exploring different wands, and experimenting with shapes, children can personalize their bubble projects and indulge in the joy of scientific exploration.

We create powerful, insightful content that fuels the minds of entrepreneurs and business owners, inspiring them to innovate, grow, and succeed.